Control joint failure industrial floor repair: fix it right
⏱️ 10 min read · Last updated: 2026
- Filler hardness: Semi-rigid joint filler for forklift-heavy floors must be Shore A 80–90 minimum; below Shore A 80 the filler compresses under hard-wheeled loads and stops supporting the joint edge (per ACI 302.1R guidance on hard-wheel traffic floors).
- Repair depth: Spalled joint edges must be cut back to sound concrete — typically 3/8″–3/4″ deep for surface joint spalling; leaving delaminated concrete in the joint guarantees re-failure within months.
- Forklift load at joints: A loaded 6,000-lb-capacity counterbalance forklift places approximately 4,000–5,500 lbs per front wheel across a joint; dynamic loads from acceleration and deceleration add a further 30–50% above that static figure.
- Expected filler lifespan: Semi-rigid polyurea correctly installed: 10–15 years; flexible urethane under forklift traffic: 2–5 years; armored joint: 20-plus years.
- Repair cost (2026): Semi-rigid joint filler repair runs $8–$18 per linear foot installed; armored joint systems run $30–$60 per linear foot installed.
A forklift wheel hits an unsupported joint edge and a chip breaks loose. Then another. Control joint failure in industrial floor repair almost never announces itself — it’s a slow grind of spalling edges that gets ignored until the gap is wide enough to catch a pallet jack wheel and earn a citation under OSHA’s walking-working-surfaces standard.
I’ve watched the same cycle repeat across distribution centers and manufacturing plants: a maintenance crew fills the joint with flexible caulk from the supply room, the forklift chews through it in six to eight weeks, and the patch cycle restarts. The filler fails, gets refilled, and fails again. The mistake is almost never the labor — it’s two decisions that happen before the tube ever gets opened: the wrong filler hardness, and no check for differential slab movement beneath the joint.
Fix those two things and you fix the joint. Skip them and no filler on the market will hold.
Why control joints fail — and why most repairs don’t hold
Control joint failure happens when the concrete edges on either side of a planned joint gap lose the support they need to survive repeated wheel loads. A control joint is an intentional weak point cut into a slab so it can shrink and crack predictably, rather than randomly. That gap has to be filled — because an open gap leaves each slab edge as a tiny cantilever every time a forklift wheel crosses it.
The edge deflects slightly under load, then springs back. After hundreds of daily crossings, the concrete at the edge fatigues and chips loose. That’s joint spalling. It’s a structural fatigue issue, not a surface defect, which is exactly why surface patching compounds always fail: they bond to the broken concrete edges and spall away along with them.
The second failure mode is less obvious and more destructive: differential slab movement. If the two panels on either side of the joint have settled at different elevations — even 1/8″ — every forklift crossing creates a vertical impact at the joint edge. No filler survives that for long. Before any control joint repair, confirm that both slabs are at the same elevation and that the subbase is stable under each. An industrial slab settlement inspection checklist can help you rule out ongoing movement before committing to a filler repair you’ll have to redo in three months.
There is also a timing issue that most guides skip entirely: new concrete joints should not receive permanent semi-rigid filler for at least 60 days after pour. The slab is still shrinking and the joint needs to complete its opening movement before you seal it. Fill too early and the joint movement tears the filler loose from one wall before the first forklift ever crosses it.
How do I repair spalled control joints in a warehouse?
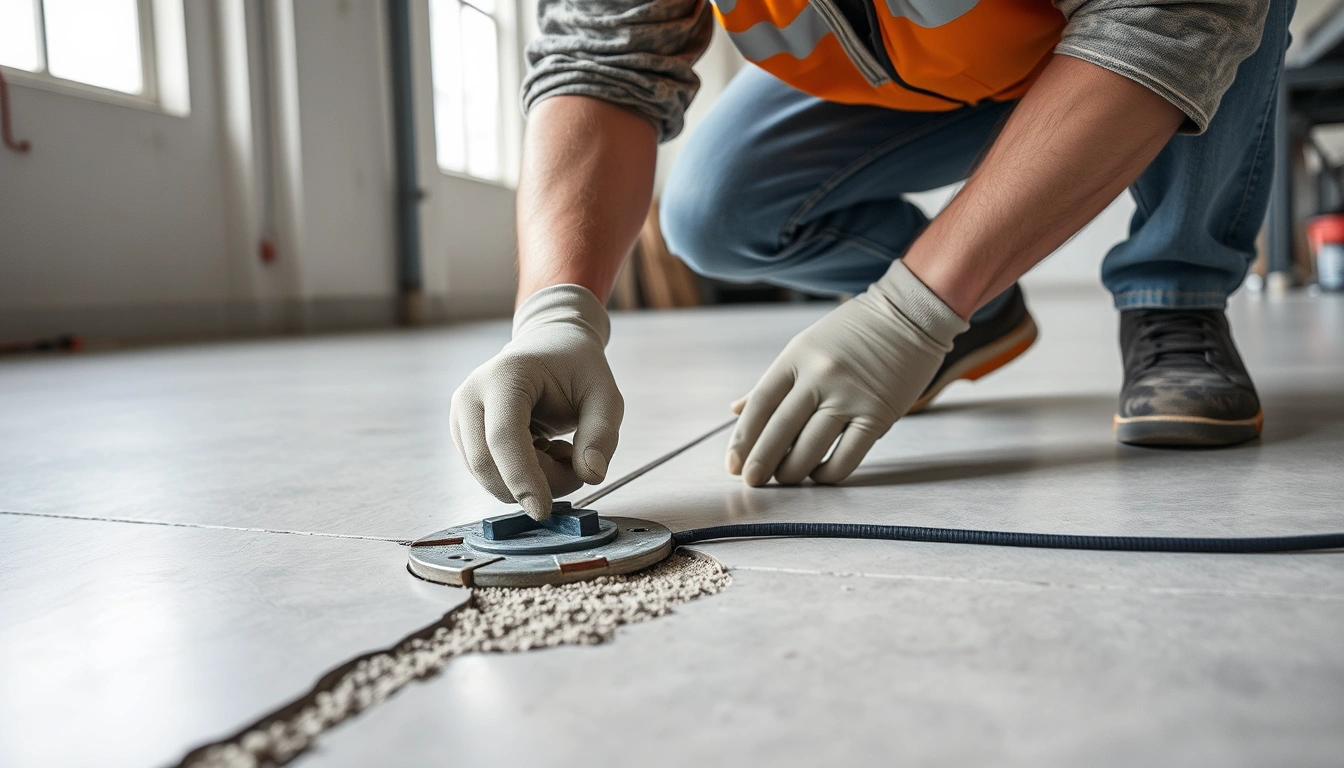
Repairing spalled control joints correctly requires nine steps in a specific sequence. Rushing the prep — especially steps 2 through 4 — is the single most common reason industrial joint repairs fail within the first season of service.
- Document and measure: Photograph the joint and measure its current width, the depth of visible spalling, and total linear footage affected. Lay a straightedge across the joint to check for differential height between slabs. If the height difference exceeds 1/4″, resolve the underlying cause before proceeding with any filler repair.
- Remove all loose concrete: Use a 4-inch angle grinder fitted with a diamond blade, or a cold chisel and hammer, to remove every delaminated or spalled piece back to solid material. The key here is the bond plane — sound concrete has a clean, gritty surface with a clear ring when tapped. Hollow-sounding sections mean delamination; those come out entirely.
- Establish correct joint geometry: The joint opening must be at least 1/4″ wide with walls that are as parallel and vertical as possible. Narrower than 1/4″ and the filler can’t achieve sufficient contact area for adhesion. A cold saw or joint grinder can open the joint to the correct width if it has closed up due to curl or debris compaction.
- Clean the joint thoroughly: Blow the joint clear with compressed air, then vacuum out all remaining debris. No dust, no moisture, no oil or curing compound residue. Semi-rigid polyurea and epoxy fillers will not bond to a contaminated surface — even a light film of concrete dust on one wall will cause delamination within weeks.
- Prime if required: Two-part semi-rigid polyurea fillers — the most common choice for forklift-trafficked floors in 2026 — typically require no primer on clean, dry concrete. Two-part epoxy fillers almost always do. Read the product data sheet for your specific filler and follow it; skipping primer on an epoxy product is a guaranteed bond failure.
- Install backer rod for deep joints: If the joint depth exceeds 1 inch, install closed-cell foam backer rod at the correct depth before filling. For semi-rigid fillers, the depth-to-width ratio should be approximately 1:1 — a 1/2″ wide joint filled to 1/2″ depth. Do not fill a deep joint in a single pour; some products require multiple lifts with cure time in between.
- Mix and pour the semi-rigid filler: Follow the manufacturer’s component ratio precisely. Incorrect mixing ratios on two-part products produce a filler that either stays tacky, cures too brittle, or never achieves the rated Shore A hardness. Fill from one end of the joint continuously; stopping mid-joint creates a cold joint in the filler itself — a weak plane where future failure begins.
- Overfill slightly and allow to cure: Leave a crown of approximately 1/8″ above the surrounding slab surface. Semi-rigid polyurea reaches functional cure in 30–60 minutes at 70°F. Two-part epoxy typically requires 8–24 hours. Concrete substrate temperatures below 50°F slow both products significantly — check the product spec for minimum application temperature before you start.
- Grind flush: Once the filler is cured, grind it flush with the surrounding slab using a floor grinder fitted with a diamond cup wheel. The finished joint should be level to within 1/32″ — notice how a correctly ground joint shows no lip, no recess, and no visible gap at the filler-to-concrete interface. That flush transition is what separates a repair that lasts a decade from one that starts delaminating in the first winter.
Why do my floor joints keep breaking under forklift traffic?
Recurring control joint failure under forklifts traces back to one of three root causes: the filler hardness is wrong for the wheel type, the subbase beneath the joint is moving, or the original joint was designed for lighter traffic than the facility now runs. Identifying which one is the actual problem changes everything about the repair approach.
The hardness problem is the most common. Forklifts in industrial environments almost universally run on polyurethane or nylon cushion tires, not pneumatic tires. Hard wheels don’t compress or distribute load the way air-filled tires do. A loaded 6,000-lb-capacity counterbalance forklift places approximately 4,000–5,500 lbs per front wheel at a joint edge — and dynamic loads from braking and acceleration add another 30–50% on top of that. Flexible filler at Shore A 20–40 compresses under that load, stops supporting the joint edge, and allows the edge to deflect. The edge fatigues and spalls. A filler rated Shore A 80–90 stays rigid enough to actually carry the edge load and prevent deflection.
The subbase problem is trickier because it doesn’t look different from a hardness problem at first. If the material beneath the slab has eroded, washed out, or was never adequately compacted, the slab rocks slightly at the joint under load — even 1/16″ of differential movement is enough to shear filler away from the concrete wall over time. Understanding when a joint problem is really a subbase problem is one of the core distinctions in industrial concrete crack repair vs leveling — and getting that diagnosis right is what determines whether you need filler or a full leveling intervention before filler.
Finally, consider whether the original joint spacing is appropriate for current traffic. ACI 302.1R recommends joint spacing of approximately 24–36 times the slab thickness. A 5-inch slab should have control joints no more than 10–15 feet apart. Oversized panels concentrate load at fewer joints — and those joints deteriorate faster than they should.
What filler is best for industrial control joints?
Semi-rigid polyurea is the best joint filler for most industrial floors with regular forklift traffic. It cures in under an hour, bonds to concrete without primer on clean substrates, and consistently achieves Shore A 80–90 when the two-component ratio is mixed correctly. It also handles thermal cycling better than epoxy-based alternatives — an important factor in facilities with heated bays adjacent to cold loading docks.
Two-part epoxy filler is a valid second choice, particularly for wider joints where its self-leveling properties help achieve full contact. The trade-offs are real though: epoxy requires primer, takes significantly longer to cure (8–24 hours vs 30–60 minutes for polyurea), and can become brittle over time in joints that see large temperature swings. In facilities with significant seasonal temperature variation, polyurea’s flexibility within its Shore A 80–90 range holds up better over the long term.
Flexible polyurethane is the wrong choice for any forklift lane. It works correctly in pedestrian areas, exterior expansion joints, and wall-to-floor transitions — and only there. Under hard-wheeled traffic it compresses, stops supporting the edge, and accelerates the spalling it was supposed to prevent. Metzger/McGuire’s MM-80 is one of the widely-referenced semi-rigid polyurea products that meets the Shore A 80 minimum; similar products from Metzger/McGuire and comparable suppliers are available through concrete supply distributors. The ASTM C1299 standard (Standard Guide for Use of Joint Sealants in Portland Cement Concrete Pavements) provides a useful framework for sealant selection by traffic type, though ACI 302.1R’s Shore A 80 minimum for hard-wheel applications is the more directly applicable threshold for most industrial floors.
| Filler type | Shore A hardness | Lifespan under forklift traffic | Best application | Approx. installed cost (2026) |
|---|---|---|---|---|
| Semi-rigid polyurea | 80–90 | 10–15 years | Heavy forklift lanes, distribution centers | $8–$15/LF |
| Two-part epoxy (semi-rigid) | 70–85 | 8–12 years | Light to medium traffic, wider joints | $10–$18/LF |
| Flexible polyurethane | 20–40 | 2–5 years | Pedestrian areas and exterior joints only | $4–$8/LF |
| Armored joint (metal nosing system) | N/A — steel or aluminum nosing | 20-plus years | Extreme traffic, repeated filler failure | $30–$60/LF |
One product spec that often surprises facility managers: concrete substrate temperature matters more than air temperature when applying semi-rigid fillers. Most polyurea products require a minimum substrate temperature of 40°F — not air temperature. On a cold concrete floor in an unheated dock, even a 60°F day may not be warm enough. Check the slab temperature with an infrared thermometer before mixing.
Armored joints: when filler alone won’t do the job
An armored joint replaces the vulnerable concrete edge on both sides of a joint with a metal nosing — typically steel or aluminum angle — that is epoxy-anchored or cast into the slab. The metal edge is what the forklift wheel actually contacts. The concrete edge never takes a direct wheel load again.
This is the repair option that most maintenance guides and most competitors ignore entirely, which means facilities that need it end up discovering it the slow way: after the third or fourth filler repair on the same joint. Use an armored joint when any of the following conditions apply:
- The same joint has had filler repairs fail twice or more under the same traffic pattern
- Forklift gross vehicle weight exceeds 15,000 lbs and traffic through that joint is constant throughout the shift
- Joint spalling has already removed more than 1 inch of concrete edge on either side
- The facility operates narrow-aisle reach trucks or turret trucks that follow a fixed travel path over the same joint hundreds of times per shift
- The floor spec demands high flatness tolerances that filler repair alone can no longer restore
Retrofitting an armored joint requires cutting back the concrete 3–4 inches on each side of the joint, grinding to sound material, and epoxy-anchoring the metal nosing sections in place. The gap between the two nosings is then filled with a semi-rigid filler or left to function as an open movement joint depending on the design. It’s more disruptive than a straight filler repair — typically requiring a 24-hour closure of the affected lane — and costs $30–$60 per linear foot installed. But on a high-traffic forklift lane, it is almost always the lower cost option when calculated over five years. Proper warehouse floor flatness FF FL requirements also play into this decision: armored joint installation must be done with attention to maintaining the surrounding slab’s FF and FL values, particularly on defined-traffic floors where tolerances are tighter.
Before vs. after: what a proper control joint repair actually looks like
A failed control joint is easy to read once you know what you’re looking at. The edges are irregular and broken, with the gap wider at the surface than at depth because the top edges have chipped away. The original sawn cut face is still visible below the spalling zone. Run your hand across it and the edges are sharp. The joint was designed to be 3/16″ wide; under progressive spalling it’s now 5/8″ or wider at the surface — and getting wider.
After a correct repair, the joint is a clean, slightly dark line in the concrete. The filler sits flush within 1/32″ of the surrounding slab on both sides. The joint edges are solid — no crumbling, no hollow response when tapped with a steel rod. When you drag a straightedge across the repair, it passes without catching. That flush, continuous transition from concrete to filler is what holds under daily forklift traffic.
| Damage stage | Observable signs | Repair depth | Recommended repair |
|---|---|---|---|
| Stage 1 — minor | Edge chips under 1/4″, filler worn flush or recessed | 3/8″–1/2″ | Clean and refill with semi-rigid polyurea, Shore A 80–90 |
| Stage 2 — moderate | Spalling 1/4″–3/4″ deep, joint visibly wider at surface | 1/2″–3/4″ | Grind to sound concrete, semi-rigid fill; check for differential slab movement first |
| Stage 3 — severe | Structural edge loss, joint over 1″ wide, repeated filler failure history | 3/4″–1.5″+ with edge reconstruction | Full joint edge reconstruction plus armored joint nosings |
| Stage 4 — critical | Differential slab height, rocking under load, visible subbase failure | Full-depth evaluation required | Subbase stabilization and industrial floor slab repair before any joint work |
One step that separates a professional control joint repair from a DIY patch: the tap test after grinding. Once the filler is flush, tap the concrete edges within 2 inches of the joint on both sides using a steel rod or hammer handle. Sound concrete rings clearly; delaminated concrete sounds dull and hollow. Any hollow section that close to the joint edge needs to be removed and the area re-filled before the repair is considered complete. Grinding a level surface onto a delaminating edge just means the failure continues invisibly beneath the filler.
- Joint filler for any forklift-trafficked floor must be Shore A 80–90 minimum — flexible caulks and polyurethane sealants will fail within one to two years under hard-wheeled traffic.
- Prep is more important than product: sound concrete, correct joint width (minimum 1/4″), clean dry walls, and no differential movement between slabs are all non-negotiable.
- If the same joint has failed with filler more than once, investigate subbase movement before refilling — or price out an armored joint, which is usually cheaper over five years on a busy lane.
- Semi-rigid polyurea lasts 10–15 years correctly installed; armored joints last 20-plus years and should be the standard spec for narrow-aisle and high-GVW forklift applications in 2026.
Common questions about control joint failure industrial floor repair
What causes control joint spalling in industrial floors?
Control joint spalling is caused by hard-wheeled forklift traffic crossing unsupported or insufficiently supported joint edges. When filler is absent or rated below Shore A 80, one slab edge deflects slightly under load while the other holds rigid, shearing off the concrete surface over hundreds of daily crossings. Contaminated or thin filler accelerates early delamination and worsens spalling faster than an unfilled joint.
How do I repair a spalled control joint step by step?
Remove all delaminated concrete to sound material — typically 3/8″–3/4″ deep — then blow clean with compressed air and vacuum. Pour a two-part semi-rigid polyurea filler rated Shore A 80–90, overfill by 1/8″, and allow 30–60 minutes to cure at 70°F before grinding flush. Do not allow forklift traffic until the thumbnail test shows no impression in the cured filler.
Semi-rigid vs. flexible joint filler — which is better for forklift floors?
Semi-rigid filler at Shore A 80–90 is the correct choice for any floor with hard-wheeled forklift traffic. Flexible polyurethane at Shore A 20–40 compresses under load, stops supporting the concrete edges, and typically fails within 2–5 years. Semi-rigid polyurea correctly installed lasts 10–15 years. Flexible filler is appropriate only for pedestrian areas or exterior expansion joints.
Why do my floor joints keep breaking under forklift traffic?
The three most common causes are wrong filler hardness (below Shore A 80), inadequate prep (dust or moisture blocking adhesion), or differential slab movement from subbase settlement. Repairs that fail within two months usually point to hardness or prep. Repairs that last a season then re-open usually indicate ongoing subbase movement that must be resolved before any refill.
How much does control joint repair cost per linear foot in 2026?
Semi-rigid joint filler repair runs $8–$18 per linear foot installed as of 2026, depending on joint width, spalling depth, and regional labor rates. Armored joint systems cost $30–$60 per linear foot installed. On high-traffic lanes that have needed two or more filler repairs, armored joints typically deliver a lower total cost over five years despite the higher initial investment.
See also: industrial floor slab repair
See also: industrial concrete crack repair vs leveling
See also: industrial slab settlement inspection checklist
Related: industrial floor safety compliance statistics
Related: cold storage warehouse floor settlement repair
Related: industrial floor grinding vs leveling for trip hazards